I was off to a party this weekend full of snark and comments from the peanut gallery while watching the royal wedding. We had a blast, I had a funky hat, and of course thematically appropriate nails!
 |
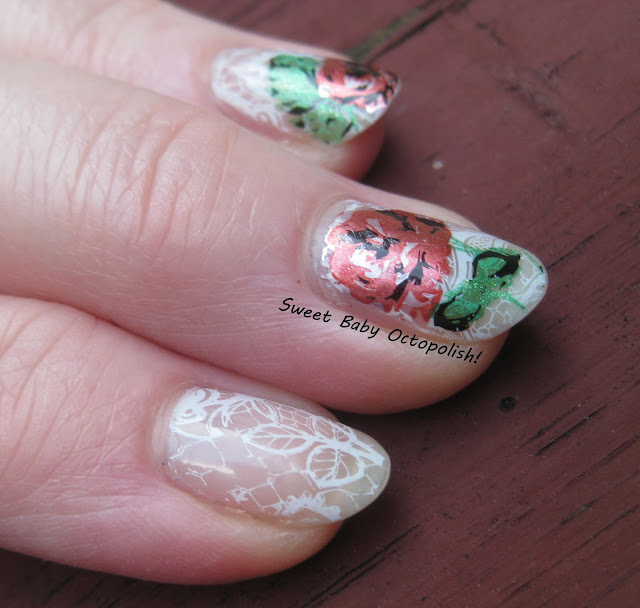
| outdoor, overcast daylight |
I started off with a single coat of a sheer nude jelly polish - everyone should have a "my nails but better" color in their stash to be a perfect neutral/nude when you need one. It's sheer enough that you can easily see my free edge through it, so not really contributing to the overall color here, but it adds a gloss and uniform tone to my nail bed that makes the rest of the art just pop.
 |
| outdoor, shady daylight |
All of my nails then got a lace design with a rose motif from Stampholic 1 using El Corazon white stamping polish. For accents, I've used the 3-step fully blooming rose image from Clear Jelly Stamper's 05 Renaissance Rose plate, first in MoYou London Frosted Lips for the base, then Pretty Serious Santa's Sunburn for the petal arrangement, and finished with NanaCoco Love Black for the detail accents. The leaves are from a couple of different options on the plate, but for all of them I've done only the base leaf shape in Pretty Serious Hack the Halls and the final details in black, and skipped the middle image.
 |
| indoor, CF lighting |
I found this plate to work beautifully and give me a great image pickup every time - a significant improvement over how finicky some of my other CJS plates can be. Typical for CJS, the images on this plate are quite small - you could make a pretty design no matter how tiny or long your nails are, using one or several roses per nail, with or without leaves to fill in more space. Because these images are so small and detailed, though, there is a serious trick to getting the multiple layers of the flowers lined up exactly. I found that it worked best for me to place my thumb at exactly 12 and my middle & index fingers at exactly 6 o'clock on my stamper, then making sure to pick up the image from the plate with my middle and index fingers at the exact "top" of the image. That way, I just had to pay close attention to how much I rotated the image before placing it on the nail, and keep the exact same degree of rotation for the next 2 layers. There's a lot of use of the word "exact" in those sentences... like I said, it's more than a bit tricky.
 |
| outdoor, overcast daylight |
Hope your weekend was as fun as mine!
~Michelle


Comments
Post a Comment